Research
Why you need strobes for Product Photography
The Importance of Lighting In Photography
Product Photography Lighting
I started looking at the set up photographers tend to use when photographing a product in a studio,depending on the size,texture and material you have to adjust some settings.
Below are a selection of my original images from my research I learned that my shots had to be framed with a lot of room around them,as you can see from my setup i had the lights close to the subject but on the lowest setting I placed the lighting at the side of the subject to avoid any glare on the watch face .I kept the background plane black and alternated this with white card,knowing I could edit this my main focus was on the light balance on the product .
In these images below you can see steps of my editing and how I am changing the background and composition of the product.
Development

Many product photographers use fluorescent lamps or available light to produce their images. Indeed, you can use these lights but do not expect the very best results. This article outlines why.
Photography 101
For an image to expose correctly, you need a given amount of light to reach your sensor. To achieve this, you have three tools at your disposal:
- Time (shutter speed),
- The opening of light that allows light to reach the sensor (aperture), and
- The sensor's sensitivity to light (ISO).
In Manual Mode, you can adjust all the above settings on your camera. When your camera is set to Auto Mode, the camera will decide these values for you; often incorrectly.
Shutter Speed Best Practice- Product Shots
Best practice for shutter speed for product photography is about 125th of a second. I shoot at 160th. Fast shutter speed helps reduce the effect of camera shake. A short exposure also insures less image noise (graininess) as long exposures tend to expose the camera’s sensor to random photons that contribute to image noise. Short Exposures are always better than long exposures.
ISO Best Practice- Product Shots
Despite what some people may say about the quality of the modern camera sensor, it is still far from perfect. I always shoot at 100 ISO or less when I shoot product photography. At ISO 100, on a full frame sensor, I notice some noise- but barely any. At ISO 400, I see noise. I guarantee that the photographer who shoots jewelry for Tiffanies never sets his camera at ISO 400.
If you have a descent lighting setup, you should be able to shoot at ISO 100 or lower all the time. My typical product photography lighting setup includes three 650-watt strobes.
Perhaps you can get away with a higher ISO for web projects publications, but I think that is just laziness or a lack of knowhow. If you know what you are doing, it takes about as much time to produce a great shot than an average one.
Aperture Best Practice- Product Shots
To get a deep depth of field, meaning that my camera will be in focus from tip to tail, I shoot at F-16. Any higher and my image will begins to soften due to diffraction. Any less and my depth of field begins to diminish. That said, I don't mind shooting as low as at F11 and as high as F18, but F-16 is my preference.
To shoot product photography under these constraints, I need a lot of light. Fluorescent lamps just don't cut it as they produce insufficient amounts of illumination. To work with fluorescent lamps, I need to open the shutter longer to get the image impression. By doing this, I find that I get more noise on the image; meaning, the photo gets grainy. This is caused by erratic photons that inappropriately fall on the camera sensor.
The workaround is to use strobe lights. My preference is to use 600 Watt strobe lights. This allows me the flexibility to use various diffusers as required. Moreover, my shutter speed can achieve 125th of a second opening time (or greater).
For best results, use a light meter.
Jules Design
Toronto Product Photography


http://thrumylens.org/featured/a-photo-shoot-in-my-watch-photo-studio/
http://www.photigy.com/lighting-the-lights-designers-tabletop-lamp-product-photography-tutorial/
https://www.youtube.com/watch?v=JP3ykBzk_RU\
 Research into setup
http://thrumylens.org/featured/a-photo-shoot-in-my-watch-photo-studio/
http://www.photigy.com/lighting-the-lights-designers-tabletop-lamp-product-photography-tutorial/
https://www.youtube.com/watch?v=JP3ykBzk_RU\
Light is everything in photography. The job of a photographer is to capture light into an still image. As photographers all the time we spend fiddling with white balance, thinking about exposure, tone, contrast is basically all about trying to best capture the light we see that reflects back off our subject.
Looking back over a couple of recent photographs it is immediately apparent that the reason they work as photographs is because the lighting conditions are just right.
With product photography (indoor studio product photography) the aim of the game is to create your own light. In the studio you have full control to light the subject exactly how you want it in order to get the best shot. This doesn’t mean that you need huge expensive lighting to make great product shots.
To prove the point this watch photograph was shot using less than $100 worth of lighting kit. In order to get full control over the lighting I switched off all of the lights in the room. It was already dark outside but i also drew all of the curtains in order to prevent any street light creeping into the shot.
The watch was simply placed on the granite counter top in my kitchen. I shot a Vivitar 285 flash on 1/8th power through a cheap shoot through umbrella positioned above and to the right of the frame. To the left of the frame I had the oven’s extractor fan light switched on which provided some rim light from the left of the frame.
I think the lesson to be learned form a shot like this is that expensive lighting isn’t required to get a good shot. By using what you have at hand (oven extractor light, kitchen worktop etc) and taking full control of the light you can produce great photographs.
If you want to learn learn more about using cheap flash guns like the Vivitar 285 to get expensive lighting results be sure to head over to the home of cheap lighting, David Hobby’s blog strobist.
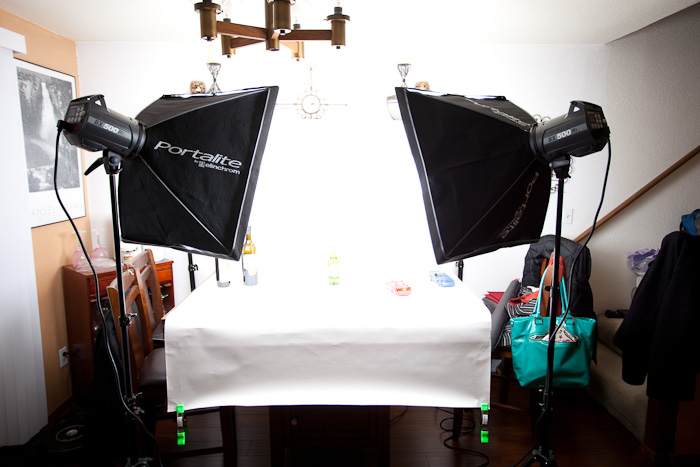


As you can see from my research into set ups all common throughout are the 2 lights.The main and the fill being positioned to the right and left of the subject, the second being further back and pointing more towards the background and the first being the more front angle
All these also have a fill light pointing directly towards the subject but this can also be achieved my using a flashgun or a already installed flash.
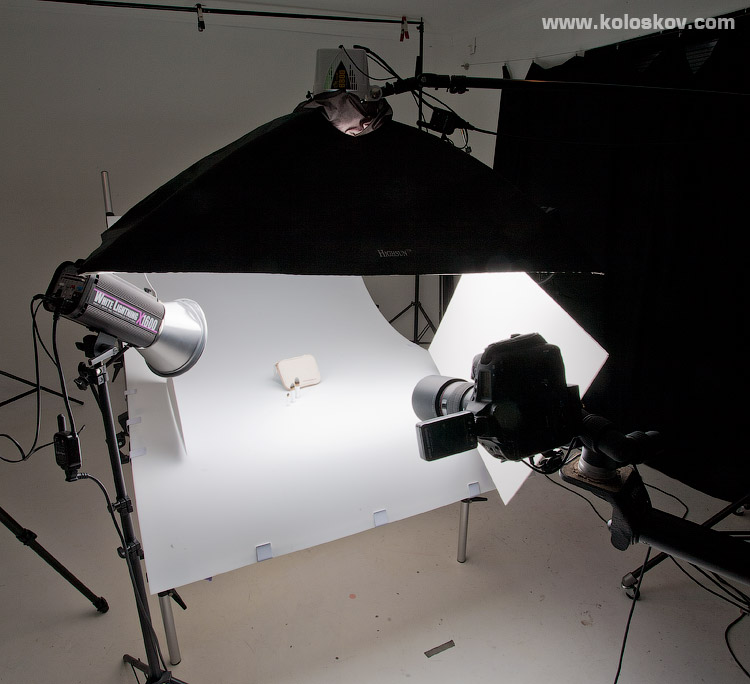
Product Photo shoot - Setup


Original images


Editing
A lot of the work in product photography relies on the editing after accomplishing the composition and lighting its all based on the clarity and flawless effect.I have edited the watch by burning the interface getting rid of any dust or makes that can be seen in the first image.The technique was also used on the white watch for the same purpose I then used the magic wand for the background and made both of these darker as it makes the subject pop more from the background,giving it a sense of depth of filed .


This Photo shoot was challenging my lighting skills as I had to adjust nearly every time I moved the object,this gave me great experience in knowing how light can reflect and how to manipulate it to your needs.
There was definitely more than what meets the eye when photographing a product such as the ice watch ,I carefully thought about the hand layout if you can see in the final image so that the hands complemented the watch,instead if obstructing the logo or being doubled up with the other hand .I also tried go get the date in line with the magnifying glass on the watch face ,this was hard as I had to go further back in order to capture this .This shoot challenged me and definitely taught me a lot about lighting in the studio
This is my first time i visit here and I found so many interesting stuff in your blog especially it's discussion, thank you.
ReplyDeletePersonal development
Great framework! A Professional Development Plan like this really helps in setting clear goals and tracking growth. I like how it balances self-assessment, SMART goals, and regular review—it makes personal and career development much more structured and achievable.- mypixeler
ReplyDelete